


Beginner’s Guide to Use Case Diagrams with Visual Paradigm Online
Introduction
Use case diagrams are a fundamental tool in the field of software engineering and systems analysis. They help visualize the interactions between users or external systems and a software system. Use case diagrams are widely used to capture, define, and communicate the functional requirements of a system. In this beginner’s guide, we will introduce you to use case diagrams and show you how to create them using Visual Paradigm Online, a powerful diagramming tool.
What is a Use Case Diagram?
A use case diagram is a graphical representation of the interactions between different actors (users or external systems) and a system. It helps answer the following questions:
- Who interacts with the system? – This is represented by actors.
- What actions or tasks can these actors perform with the system? – These are represented by use cases.
- How do these actors and use cases interact? – This is shown through associations (lines) between actors and use cases.
Getting Started with Visual Paradigm Online
Before we dive into creating a use case diagram, you’ll need access to Visual Paradigm Online. If you don’t already have an account, you can sign up for a free account or use a trial version. Once you’re logged in, follow these steps:
Step 1: Create a New Project
- After logging in, click on “Create Project” or “New Project” to start a new project.
Step 2: Add a Use Case Diagram
- Inside your project, click the “Diagram” tab.
- Select “Use Case Diagram” from the list of diagram types.
Step 3: Adding Actors
- To add actors, click on the “Actor” icon on the left toolbar.
- Click on the diagram canvas where you want to place the actor.
- Name the actor by double-clicking on it and typing a name.
Step 4: Adding Use Cases
- To add use cases, click on the “Use Case” icon on the left toolbar.
- Click on the diagram canvas to place a use case.
- Double-click on the use case to name it.
- To connect use cases to actors, click and drag from the use case to the actor. This represents the association between them.
Step 5: Adding Relationships
- You can add relationships between use cases using the “Association” icon on the left toolbar.
- Click on the use case you want to connect, then click on the second use case to establish an association.
Step 6: Adding Details
- To add details or descriptions to actors, use cases, or associations, you can right-click on them and select “Open Specification.”
- Here, you can add descriptions, constraints, and other relevant information.
Step 7: Save and Share
- Don’t forget to save your project regularly.
- You can share your use case diagram with others by inviting them to your project or by exporting the diagram as an image or PDF.
Learning by Examples with Visual Paradigm Online Templates
Visual Paradigm Online offers a large collection of templates to help you get started with various diagram types, including use case diagrams. Here’s how you can use templates for learning:
- In Visual Paradigm Online, go to the “Templates” section.
- Browse through the available templates and select a use case diagram template that matches your project or learning objectives.
- Click on the template to open it in the editor.
- Study how the actors, use cases, and associations are organized in the template.
- Modify the template to fit your specific use case diagram requirement
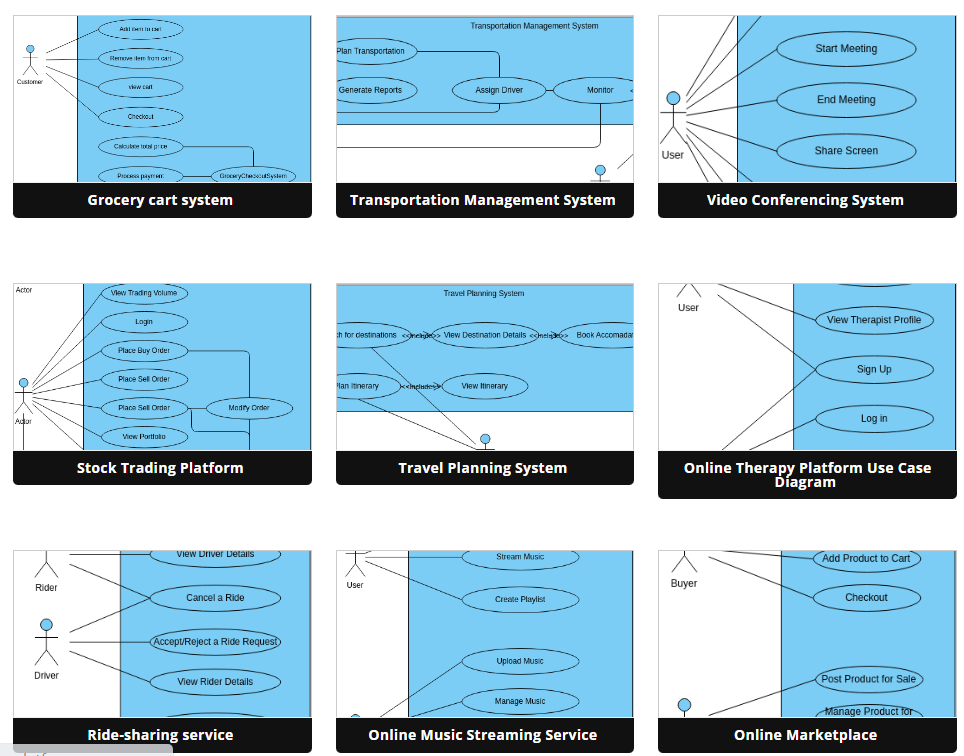
Learning by examples can be an effective way to understand the best practices in creating use case diagrams and gain inspiration for your own projects.
Summary
Use case diagrams are valuable tools for visualizing system interactions and requirements. Visual Paradigm Online provides an accessible platform for creating these diagrams, and the use of templates can help you learn and apply the concepts effectively. Practice and experimentation will enhance your skills in creating clear and informative use case diagrams for your software development projects.
This post is also available in Deutsche, Español, فارسی, Français, English, Bahasa Indonesia, 日本語, Polski, Portuguese, Ру́сский, Việt Nam, 简体中文 and 繁體中文.
