


Filter Element in Timeline

VP Online Animated Explainer is a versatile and user-friendly video creation tool that empowers individuals and businesses to craft captivating animated videos effortlessly. With an extensive library of customizable templates, it enables users to streamline video production, saving time and resources. This efficiency is complemented by the tool’s easy customization options, ensuring that your videos align perfectly with your brand and messaging, all within a seamless and efficient workflow.
Filter the elements we want in timeline
As we delve into customizing our video projects, the timeline often becomes a repository for an ever-expanding array of elements. These elements can include text , images, characters in different styles, background images, and audio tracks. However, as our videos grow in complexity, pinpointing and editing specific segments can become a challenge. To address this issue, the filter function emerges as a valuable ally, simplifying the process of locating and modifying the precise elements we need within the timeline.
Filter function in timeline
Click the Filter Button on the top left of timeline.
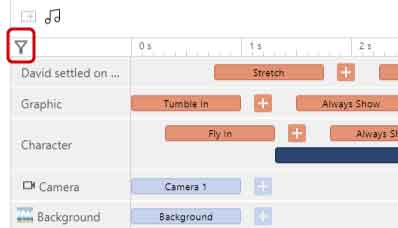
After that, select the elements that we need and start editing.

Tip: Elements on the screen are connected to the timeline. When we select an element, it is also highlighted on the timeline and vice versa.
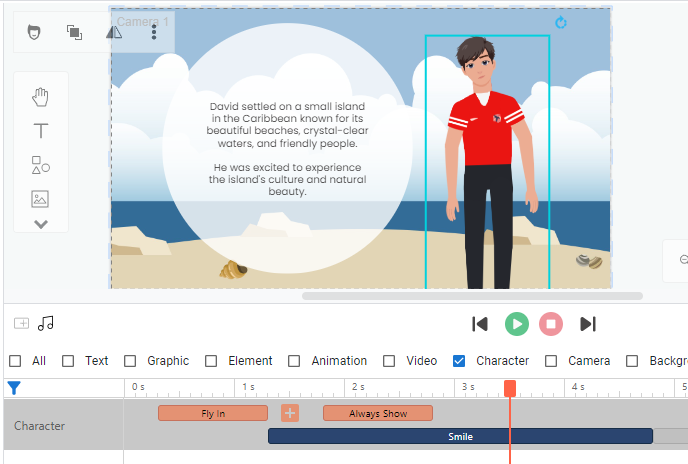
Animation in the filter
There is a category in the filter called “Animation” which represents animated elements in the repository, as opposed to “animations” such as fades, fades or moves.

For those types of animations, they are placed with their corresponding elements. For example, “Fly In”, “Motion Path” and “Always Show” above “Action-Smile” are the animations for the selected character. We can click on them to edit them.

This post is also available in Deutsche, Español, فارسی, Français, English, Bahasa Indonesia, 日本語, Polski, Portuguese, Ру́сский, Việt Nam, 简体中文 and 繁體中文.
