Showcase My Flipbook With A Bookshelf
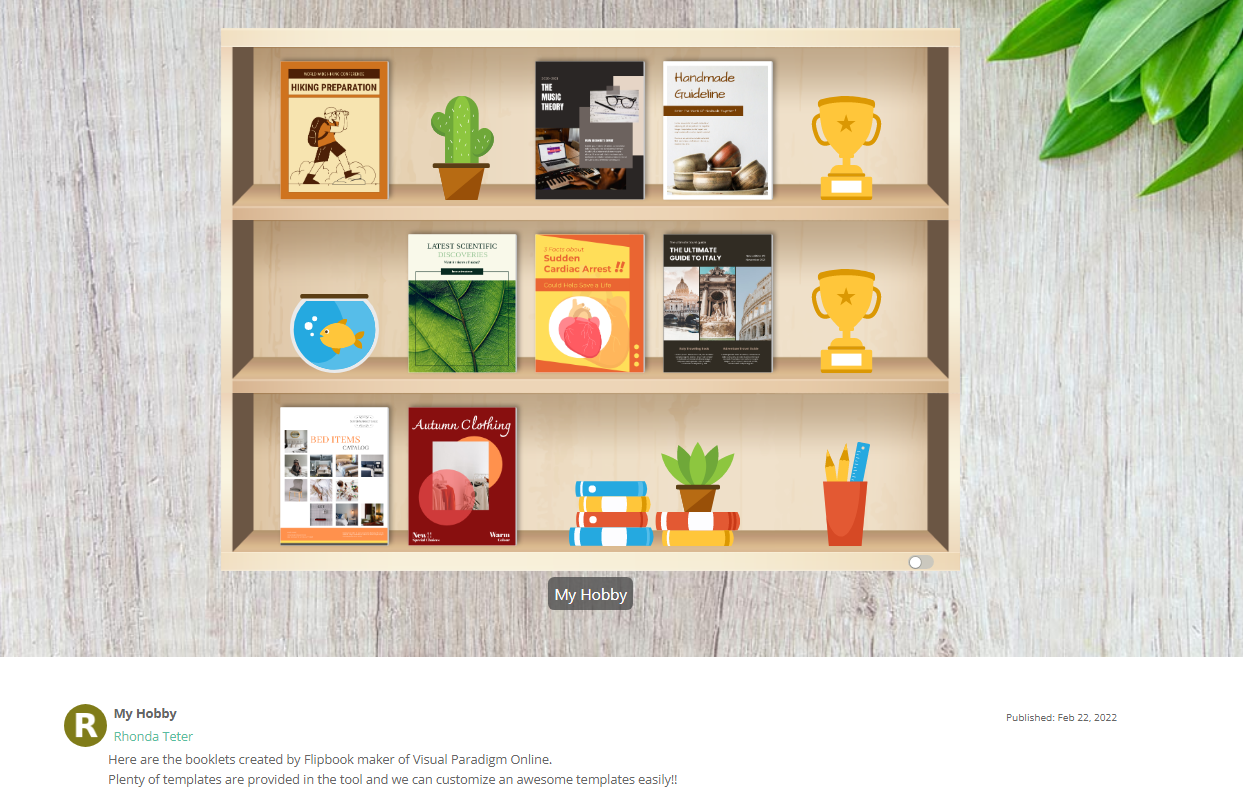
After creating some flipbooks, we need a bookshelf to display them well! You can now do it on Fliplify. by managing the bookshelf and adding decorations, you can share your works with others in an interesting way!
How To Manage Your Bookshelf
Create A Bookshelf
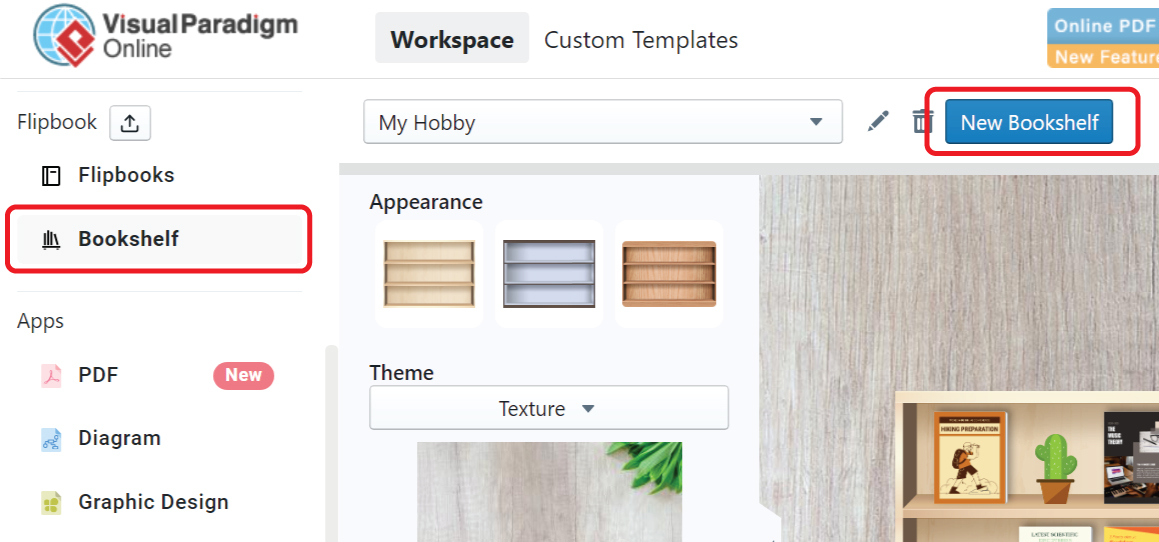
First of all, you need to create a new bookshelf.
By clicking ” New Bookshelf” under My Bookshelf, a new bookshelf is created and you can then start the setting.
Setting Of The Bookshelf
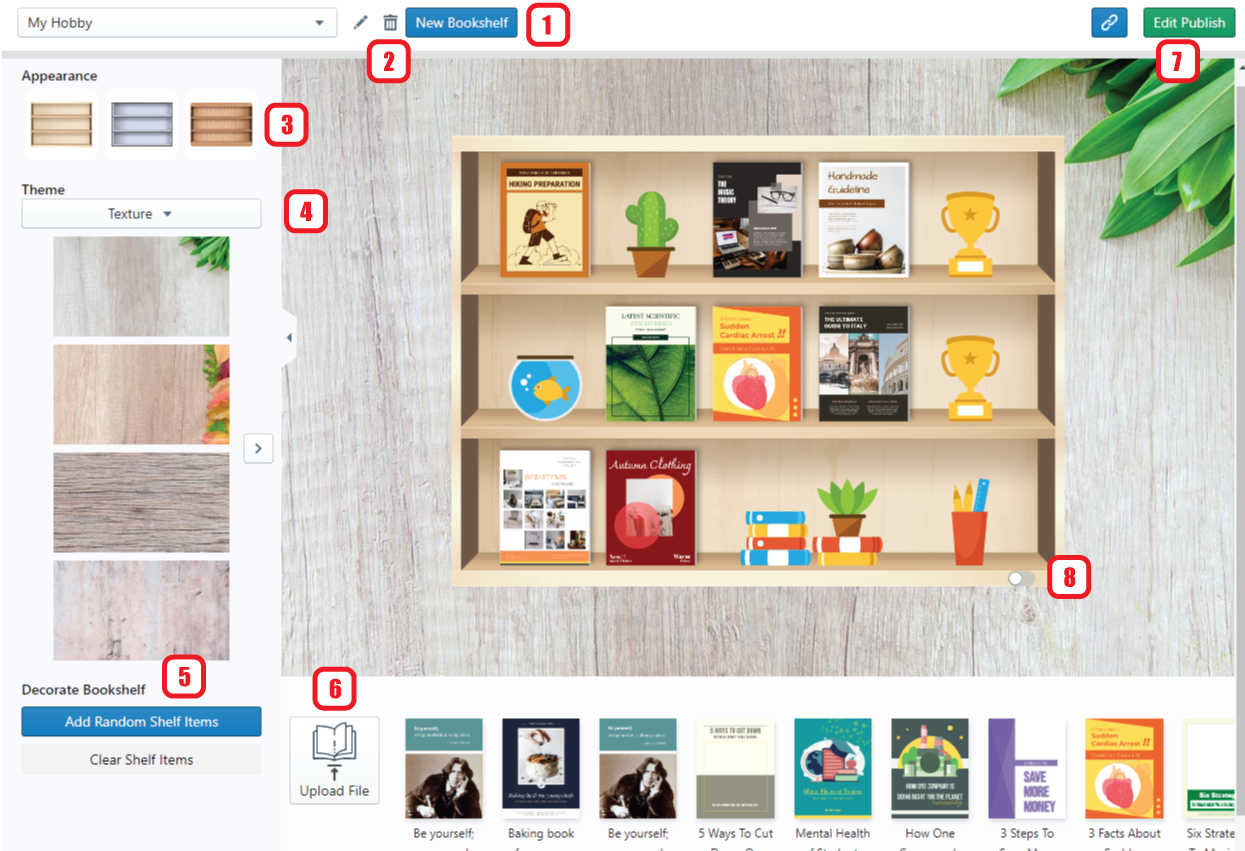
- Rename the bookshelf
- Deleted the bookshelf
- Select the appearance of the bookshelf
- Select the theme of the bookshelf
- Add / Clear decoration
- Upload PDF / Displaying the exported flipbook
- Publish the bookshelf
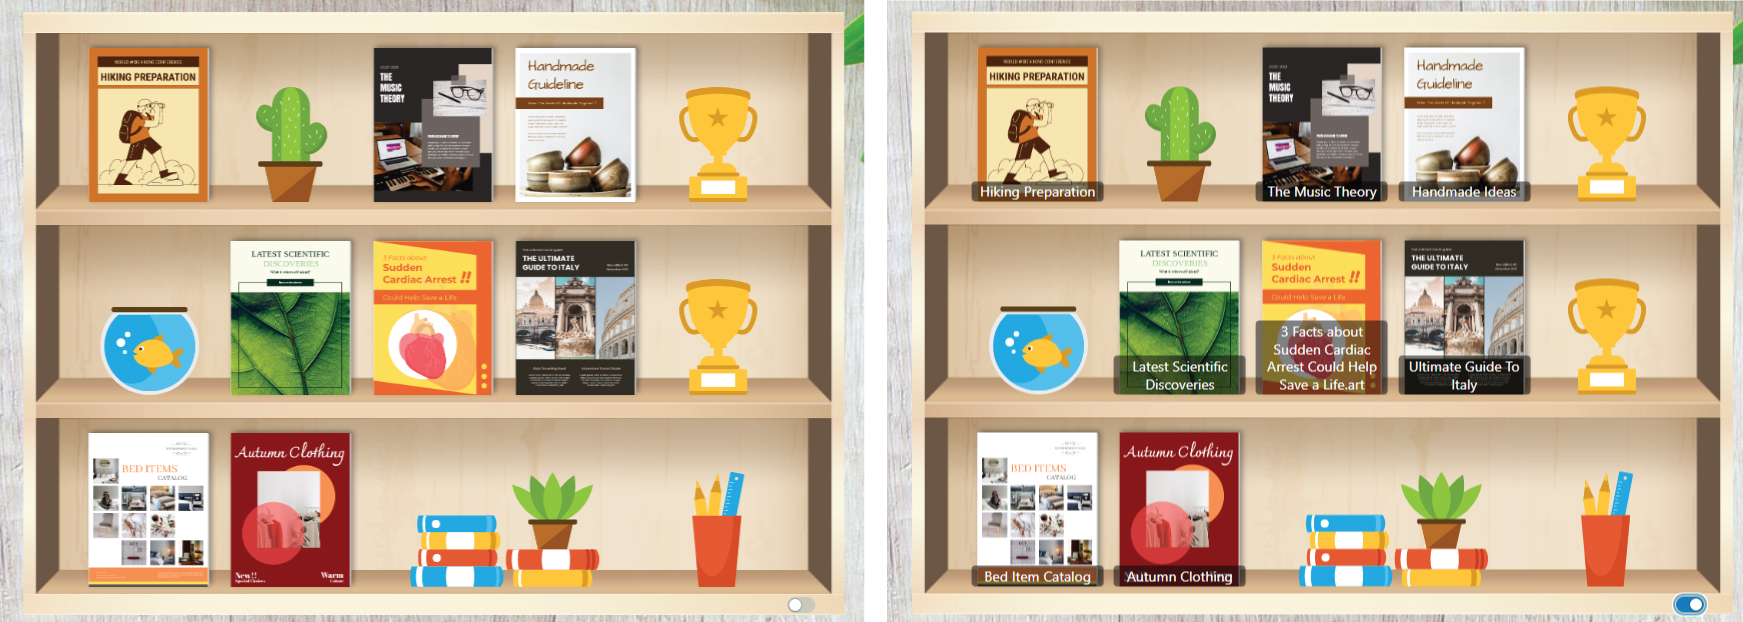
- Show / Hide the title of the flipbook
Tips When Managing The Bookshelf
- You can choose to place the flipbooks at the location you want freely by dragging the books.
- The decorations are randomly added. You can click to discover what are included in your bookshelf!
After customizing the bookshelf, we can then share it with others!
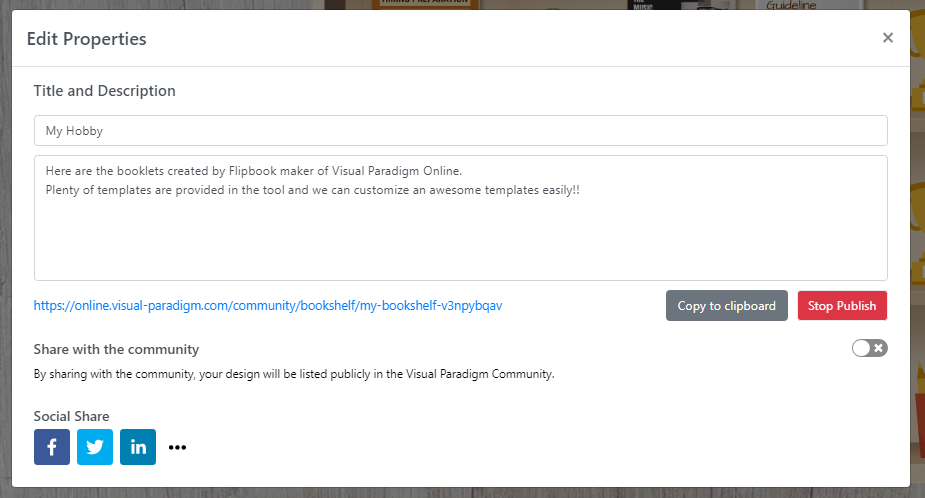
After pressing “Publish“, we can start editing the properties.
You can share the others by giving them the link of the bookshelf, and also clicking the icon of different social medias below for sharing.
If you also want the others to find your bookshelf in the web, remember to turn on the ” Share with the community”.
This post is also available in Deutsche, Español, فارسی, Français, Bahasa Indonesia, 日本語, Polski, Portuguese, Ру́сский, Việt Nam, 简体中文 and 繁體中文.


